EP1000
Assignment Computer Aided Design Introduction
Content
In this assignment, you will install GIMP/Photoshop and Fusion 360. You will use these packages, with the aid of online tutorials, to create preliminary designs. You will then document your work in the blog.
I have provided approximate timings for you so that you do NOT spend all your time (doing something you like and neglecting other modules!)
| Time | Task |
|---|---|
| 10 min | Install GIMP/Photoshop, Fusion 360 |
| 20 min | Watch one tutorial Youtube video on GIMP/Photoshop |
| 20 min | Use GIMP to modify a photo by removing the background |
| 20 min | Go through one tutorial on Fusion 360 interface |
| 20 min | Work through one tutorial using Fusion 360 |
| 30 min | Complete the design projects below |
Guides on doing each part
- GIMP
- recommended tutorials (choose one)
- Tech Gumbo How To Use GIMP
- Chris Tutorials Learn Gimp In 30 Minutes
- try using GIM to resize a photograph to a height of 500 pixels.
- To remove the background from a photo:
- Search Youtube for “gimp remove background from image” and choose one tutorial and follow it
- Choose one of your photos, remove the background and replace it with a seaside view of your choice.
- Document your work as a “How-to” for GIMP
- recommended tutorials (choose one)
- Fusion 360
- Work through Autodesk Fusion 360 tutorials until “Create a project”
- Go through Kevin Kennedy’s - Fusion 360 Interface
- Try the “Initials Keyring” exercise from WarWick University
- Complete the following exercises. Treat each exercise as a new drawing and component.
- Exercise 1
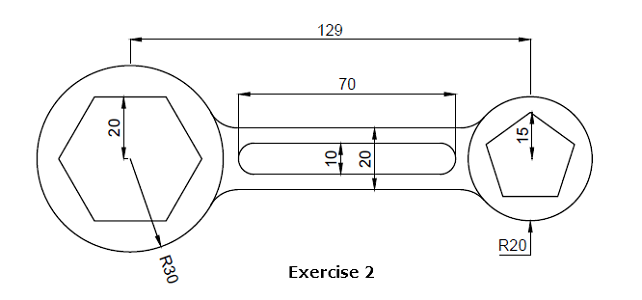
- Exercise 2 - Worked Example
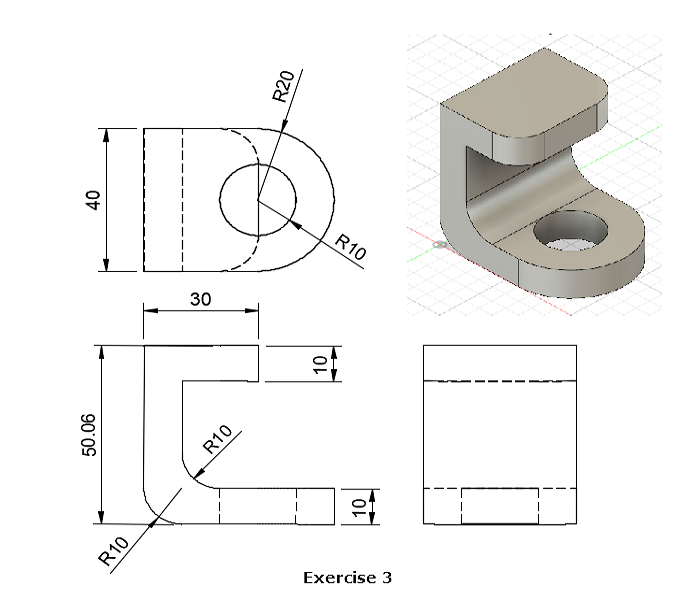
- Exercise 3 - you may need to use the “Extrude” command
When you have completed the exercise, use the following steps to export your work to a Fusion360 (.f3d) file and attach it to your blog. The way to do it is
 |
|
|---|---|
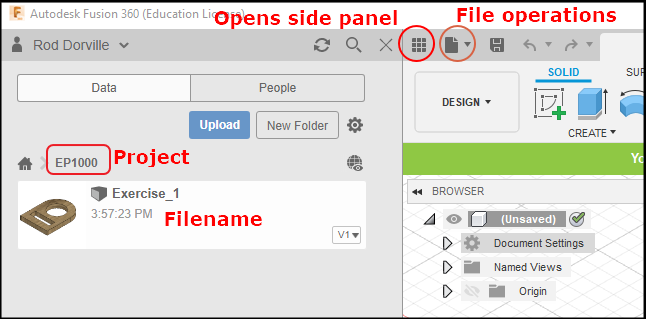 |
While in Fusion 360, create a new Project to keep all your files. Save your Fusion 360 exercise, use an appropriate name e.g. Exercise_01 |
 |
After you have saved your file, click on the File icon at the top and select “Export” |
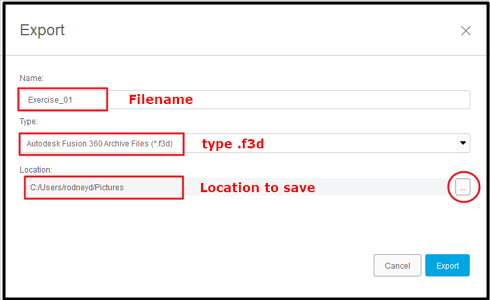 |
Enter filename, check .f3d format, select folder store exported file |
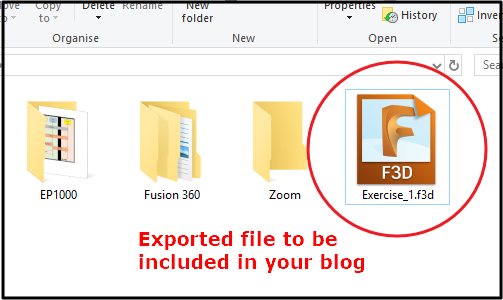 |
Copy the file into your folder, link it in your blog and then upload to the repository. |
May 2020